
How to Fix Drafty Window Frames: A Complete Guide
Table of Contents
How to Find Where a Window is Draughty
Visual inspection of frames and sashes
The smoke test and other detection methods
How to Seal Gaps Around Window Frames
Caulking exterior and interior gaps
Weatherstripping sashes and frames
How to Tighten a uPVC Window Seal
Adjusting hinges and locking mechanisms
Replacing worn gaskets and seals
Temporary Fixes for Draughty Windows
Window insulation film and thermal liners
Draft stoppers and heavy curtains
Permanent Repairs for Drafty Window Frames
Addressing frame-to-wall gaps and rough opening insulation
When repair is not enough: replacement considerations
Common Mistakes to Avoid When Fixing Draughty Windows
Conclusion
Frequently Asked Questions
Last Updated: October 9, 2026
How to Find Where a Window is Draughty
The first step to fix drafty window frames is finding exactly where the cold air enters. Most homeowners guess and waste time on the wrong spots.

Start with a visual inspection. Check where the frame meets the glass, where the sashes slide together, and where wood or uPVC meets the wall. Run your hand slowly around these areas on a cold day; you'll feel air movement if there's a gap.
Pay special attention to older wooden frames. They shrink over time, creating gaps between the sash and frame. Modern uPVC windows fail differently, the rubber gaskets dry out and no longer seal properly.
Visual inspection of frames and sashes
Daylight leaking around a frame is a clear sign of drafts. On a sunny day, close all curtains and blinds, then look for light streaks around the frame edges.
Check the bottom of the sashes first, where most drafts start. The seal between the lower and upper sash often fails before other areas.
Inspect the corners carefully. They're weak points where two pieces of material meet, and moisture and temperature changes cause joints to separate over time.
For wooden frames, look for paint that's peeling or cracked. This indicates the wood underneath has shifted. Movement breaks the seal.
The smoke test and other detection methods
The smoke test is the most reliable way to pinpoint drafts.
Move the incense slowly around the entire frame and mark any areas where smoke gets pulled inward. This reveals drafts you might miss with your hand alone.
A thermal imaging camera is more precise but costs more. It shows temperature differences around the frame, and cold spots indicate air leaks.
The candle test works similarly to smoke. A lit candle flame will flicker near air gaps. Be careful not to let the candle contact the window or frame.
On windy days, you can feel drafts more easily. Wind pressure forces air through small gaps. This makes detection simpler but less precise than smoke testing.
How to Seal Gaps Around Window Frames
Once you've found the drafts, sealing them stops the cold air. The method depends on where the gap is and how wide it is.
Interior gaps between the frame and sash require weatherstripping. Exterior gaps between the frame and wall need caulking. Frame-to-wall gaps deeper than 5mm may need foam insulation first.
Caulking exterior and interior gaps
Caulk fills gaps that are too small for weatherstripping but too large to ignore.
Clean the gap thoroughly first, removing old caulk with a caulking gun or putty knife.
Choose the right caulk type. Silicone caulk works well on exterior frames and around uPVC windows. Acrylic caulk suits interior gaps and wooden frames.
Apply caulk in one smooth bead, running the gun slowly along the gap with steady pressure.
Smooth the caulk with a wet finger or tool immediately after application, then let it cure fully before painting. Most caulks need 24-48 hours.
For gaps wider than 10mm, use backer rod first. This foam rope fills most of the gap. Then apply caulk over the top.
Weatherstripping sashes and frames
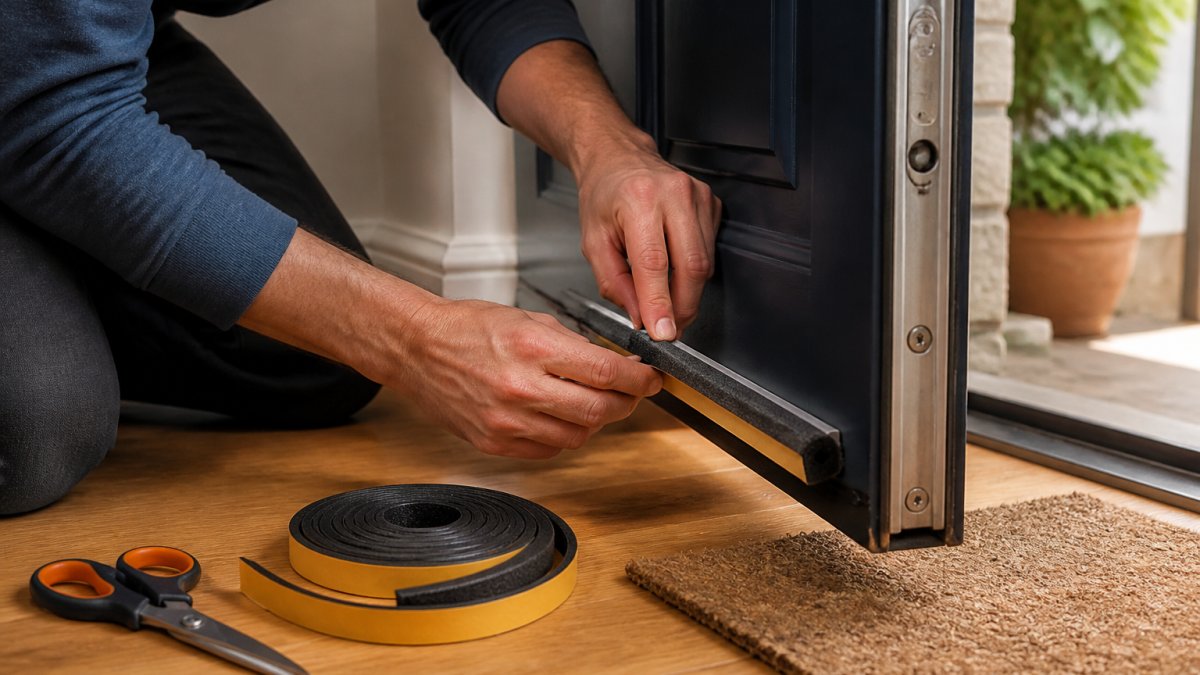
Weatherstripping seals the moving parts of the window. It's temporary but replaceable when it wears out.
Measure the perimeter of the sash or frame. Buy weatherstripping slightly longer than needed. You can trim excess.
Clean the surface with a damp cloth and let it dry completely; dust and dirt reduce adhesion.
For sash tracks, use a different style of weatherstripping. These tracks are flat and need a strip that fills the channel without blocking movement.
Test the window after installing weatherstripping. It should close smoothly; if it's too tight, remove the strip and try a thinner option.
Weatherstripping typically lasts 3-5 years before it hardens and loses grip. Plan to replace it when you notice reduced effectiveness.
How to Tighten a uPVC Window Seal
uPVC windows are common in modern homes. They're durable, but the seals deteriorate; tightening and replacing them restores performance.
Home RenoVision DIY
uPVC windows have adjustable hinges and locking mechanisms. These can be tightened to improve the seal. They also have rubber gaskets that dry out over time.
Adjusting hinges and locking mechanisms
Hinges on uPVC windows have adjustment screws. These screws control how tightly the sash closes against the frame.
Locate the adjustment screws on the hinges, usually on the inside edge, and turn them with a hex key or Allen wrench.
Turn the screw clockwise to tighten the seal. Make small adjustments, quarter turns at a time. Test the window after each adjustment.
The goal is a firm seal without excessive force to close the window. If you have to push hard, you've tightened too much.
Check the locking mechanism too.
Tighten any loose bolts on the handle. Apply a small amount of lubricant to the lock mechanism. This keeps it working smoothly.
Replacing worn gaskets and seals
Rubber gaskets around uPVC frames harden and crack over time, losing their seal. Replacement is straightforward.
The gasket sits in a groove around the frame. Remove it by hand or with a flat tool, pulling gently to avoid damaging the groove.
Measure the old gasket or groove dimensions and buy matching replacements, which are inexpensive and widely available.
Clean the groove thoroughly of debris, old adhesive, and dirt so the new gasket seats properly.
Press the new gasket into the groove, working around the frame so it sits evenly without twists or gaps.
Test the window seal after replacing the gasket. Close it firmly and feel for drafts. The improvement should be noticeable immediately.
Temporary Fixes for Draughty Windows
If permanent repairs aren't possible right now, temporary fixes reduce drafts quickly.
They cost less, need no installation skills, and are ideal while you plan permanent repairs or need immediate winter relief.
Window insulation film and thermal liners
Window insulation film creates an extra air layer over the glass. This reduces heat loss and air movement.
Clean the glass thoroughly with a cloth and glass cleaner; dust and dirt prevent the film from adhering.
Heat the film with a hair dryer on low; it shrinks slightly, creates a tight seal, and becomes nearly invisible.
Thermal liners are heavier insulating panels that hang like curtains. They're reusable, removable, and ideal for rentals where permanent changes aren't allowed.
Attach thermal liners to the wall above the window with magnetic strips or hooks so they cover the entire window and frame.
These liners block cold air and reduce heat loss significantly. They also darken the room, which some people prefer and others don't.
Draft stoppers and heavy curtains
Draft stoppers block air at the sill where it enters the room. They're simple, inexpensive, and effective.
Place a draft stopper along the bottom edge of the frame, fitting it snugly between the frame and the floor or sill. Seal gaps beside it with rolled towels if needed.
Heavy curtains reduce air movement around the window, acting as an insulating layer. Close them at night and on cold days.
Thermal curtains are thicker and more effective than standard ones. They have a reflective backing that bounces heat back into the room.
Hang curtains as close to the ceiling as possible, extending to the floor or sill, to maximize the insulated area and reduce air circulation.
Permanent Repairs for Drafty Window Frames
Permanent fixes address the root cause of drafts, last for years, and significantly improve your home's energy efficiency.
We recommend permanent solutions when you plan to stay in your home long-term. The initial investment pays back through lower energy bills and improved comfort.
Addressing frame-to-wall gaps and rough opening insulation
Remove the interior trim around the window to expose the gap between the frame and the rough opening in the wall.
Fill the gap with low-expansion foam, spraying in layers and letting each cure slightly before adding more.
Once cured, trim the excess foam with a utility knife. It should be flush with the frame edge.
Install new trim over the sealed gap. This protects the foam and gives a finished appearance. Seal the trim edges with caulk.
For deep gaps over 50mm, place wooden shims every 300mm around the frame first, then apply foam around them.
This approach prevents excessive foam expansion and provides solid support for the frame.
When repair is not enough: replacement considerations
Some windows are beyond effective repair. Severe rot, broken glass, or failed seals across multiple panes indicate replacement time.
Replacing windows is expensive but right in certain situations. Modern windows are far more efficient, and energy savings often justify the cost over 10-15 years.
Consider replacement if:
Multiple panes are broken or fogged
Wooden frames show rot or deep cracks
The frame no longer closes properly
Repairs would cost more than 50% of replacement price
Your home is very old and windows are original
New windows come with warranties. Installation by professionals ensures proper sealing. The improvement in comfort and energy efficiency is substantial.
We can assess your windows and recommend the best approach, whether repair or replacement, for your situation.
Common Mistakes to Avoid When Fixing Draughty Windows
Many homeowners make errors that waste money or create new problems. Knowing them helps you avoid them.
Sealing without finding the source. Caulking randomly wastes material and rarely solves the problem.
Using the wrong caulk type. Silicone caulk on wooden frames can cause problems. Acrylic caulk on exterior gaps fails quickly.
Applying caulk over dirt. Caulk won't bond to dusty surfaces, and a poor bond means early failure. Clean thoroughly first.
Weatherstripping too thickly. Thick strips make windows hard to close and can bend the frame.
Ignoring frame-to-wall gaps. Homeowners focus on frame-to-sash gaps and miss the bigger problem.
Replacing gaskets without cleaning the groove. Debris prevents proper seating, so the new gasket won't seal well. Always clean first.
Conclusion
To fix drafty window frames, you must find the problem first, then choose the right solution. The smoke test reveals where cold air enters. Small gaps need weatherstripping or caulk; larger gaps need foam and careful sealing. Some windows respond to adjustment and gasket replacement, while others need complete replacement.
Temporary fixes like film and draft stoppers provide quick relief, while permanent repairs like frame-to-wall insulation and new gaskets last for years. The best choice depends on your budget, window type, and how long you plan to stay.
Building Regulations guidance on window installation and thermal performance outlines standards for energy efficiency in homes. Meeting these standards improves comfort and reduces heating costs.
Dri-House combines window expertise with damp and ventilation solutions. Our team recommends the right fix for your situation, whether that's repair, replacement, or a combination approach. Energy Saving Trust guidance on reducing draughts and heat loss provides additional resources for homeowners. Book a free call with our team to discuss your window issues and get honest advice on the best path forward.
Frequently Asked Questions
Can I fix a draughty window frame without replacing it?
Yes. Most draughty window frames can be repaired without full replacement. Weatherstripping, caulking, and adjusting seals address common air leaks in wooden and uPVC frames. Frame-to-wall insulation and temporary fixes like film or draft stoppers also work. Full replacement is only necessary when frames are severely rotted, warped beyond adjustment, or when repairs no longer hold.
How do I know if the draught is coming from the frame or the window opening?
Use the smoke test: hold a lit incense stick near the frame edge, sash track, and corner joints. Smoke movement shows where air enters. Drafts from the opening itself (between panes or sash edges) require weatherstripping or seal tightening. Drafts from the frame-to-wall gap need caulk or foam insulation. Visual inspection for visible gaps and cracks also helps pinpoint the source.
What is the most effective temporary fix for draughty windows in winter?
Window insulation film applied to the interior provides the fastest, most cost-effective temporary seal. It creates an airtight barrier and adds a thin insulating layer. Draft stoppers placed along the bottom sash track block cold air at the source. Heavy curtains or thermal liners reduce heat loss through radiation. For immediate relief, combine film with draft stoppers and close curtains at night.
How long do weatherstripping and caulk repairs last?
Quality weatherstripping lasts 5-10 years depending on material (rubber, foam, or silicone) and exposure to weather. Exterior caulk typically lasts 5-7 years before cracking or shrinking. Interior caulk lasts longer in stable conditions. Regular inspection and reapplication every few years maintains an airtight seal. Silicone caulk and premium weatherstripping materials offer longer durability than cheaper alternatives.
Book Free Call

Comments